> 本Demo演示Easy-Es与Springboot项目无缝集成,强烈建议先下载,直接在您本地运行,避免自己集成时因springboot等版本兼容问题踩坑.
> Demo下载地址: ✔[Gitee](https://gitee.com/easy-es/easy-es-springboot-demo) | ✔ [Github](https://github.com/xpc1024/easy-es-springboot-demo)
# Demo介绍
---
## 1.项目结构
---
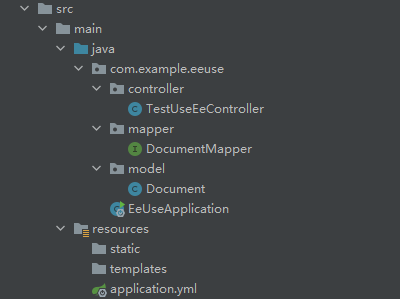
为了演示方便,本demo省略service层
## 2.Pom
---
```xml
4.0.0
org.springframework.boot
spring-boot-starter-parent
2.6.0
com.example
ee-use
0.0.1-SNAPSHOT
ee-use
Demo project for Spring Boot
1.8
org.springframework.boot
spring-boot-starter-web
io.github.xpc1024
easy-es-boot-starter
0.9.20
org.springframework.boot
spring-boot-starter-test
test
org.springframework.boot
spring-boot-maven-plugin
```
## 3.核心代码
---
```java
@RestController
@RequiredArgsConstructor(onConstructor = @__(@Autowired))
public class TestUseEeController {
private final DocumentMapper documentMapper;
@GetMapping("/insert")
public Integer insert() {
// 初始化-> 新增数据
Document document = new Document();
document.setTitle("老汉");
document.setContent("推*技术过硬");
return documentMapper.insert(document);
}
@GetMapping("/search")
public List search() {
// 查询出所有标题为老汉的文档列表
LambdaEsQueryWrapper wrapper = new LambdaEsQueryWrapper<>();
wrapper.eq(Document::getTitle, "老汉");
return documentMapper.selectList(wrapper);
}
}
```
## 4.启动及使用
---
### a.添加配置信息
```yaml
easy-es:
enable: true # 默认为true,若为false时,则认为不启用本框架
address : 127.0.0.0:9200 #填你的es连接地址
# username: 有设置才填写,非必须
# password: 有设置才填写,非必须
```
### b.启动项目
使用你的IDE启动项目

如果你的配置正确,ES版本及Springboot版本均兼容,你将看到ES索引被框架自动创建,并在控制台输出:
===> Congratulations auto process index by Easy-Es is done !
### c.使用
[http://localhost:8080/insert](http://localhost:8080/insert) (插入数据)
[http://localhost:8080/search](http://localhost:8080/search) (查询)
效果图:


## 5.结语
---
至此,您已初步体验Easy-Es的基本功能,如果你感觉使用起来体验还不错,想进一步体验更多强大功能,那就继续往下看吧!